Creating Your First WordPress Pages & Posts (Step-by-Step)
After you've picked a theme, installed some essential plugins, and configured your basic settings, there's one big question staring you in the face: how do I actually put content on this thing? That's exactly where I was when I built my first WordPress site years ago. The dashboard was set up, the theme looked great, but the site was completely empty.
The good news is that creating content in WordPress is incredibly straightforward once you understand the difference between pages and posts, and once you get the hang of the block editor (Gutenberg). In this guide, I'll walk you through everything — from understanding when to use a page versus a post, to actually building your first pieces of content using the editor that ships with every WordPress installation.
If you're following along with the full how to make a WordPress website guide, this is step 7. By now you should have WordPress installed with your theme and plugins ready to go. If not, go back and knock those out first — you'll have a much smoother experience creating content on a properly configured site.
Pages vs Posts — What's the Difference?
This is the first thing that confuses almost every WordPress beginner, and honestly it confused me too. WordPress has two main content types: pages and posts. They look similar in the editor, but they serve very different purposes.
Pages are for static, timeless content. Think About, Contact, Privacy Policy, Services — content that doesn't change often and doesn't need a date attached to it. Pages live outside your blog feed and aren't organized by categories or tags. They're the backbone of your site's structure.
Posts are for timely, regularly updated content. Blog articles, news updates, tutorials — anything that benefits from being organized chronologically. Posts appear in your blog feed (newest first), can be assigned categories and tags, and are what most people think of as "blog content."
Here's my rule of thumb: if the content answers "what is this site about?" or "how do I contact you?" — it's a page. If it answers a specific question, teaches something, or shares news — it's a post. When in doubt, it's probably a post.
Essential Pages Every Site Needs
Before you start cranking out blog posts, every WordPress site needs a few foundational pages. I set these up on every single site I build, and you should too:
- Home page — Your front door. This is the first thing visitors see. It should clearly explain what your site is about and guide people to your best content.
- About page — Who are you and why should anyone listen to you? This doesn't need to be a novel. A few paragraphs about you, your experience, and what the site offers is plenty.
- Contact page — Give people a way to reach you. A simple contact form (you can use a plugin like WPForms or Contact Form 7) works perfectly.
- Privacy Policy — This is legally required in most jurisdictions, especially if you use analytics, cookies, or collect any data. WordPress actually generates a basic one for you under Settings → Privacy. Start there and customize it.
You don't need to make these pages perfect right away. Get them up with basic content, and refine them as your site grows. I've rewritten my About page probably a dozen times across my various sites — it's always evolving.
Creating Your First Page
Let's get hands-on. Here's how to create your first page in WordPress:
- In your WordPress dashboard, go to Pages → Add New Page.
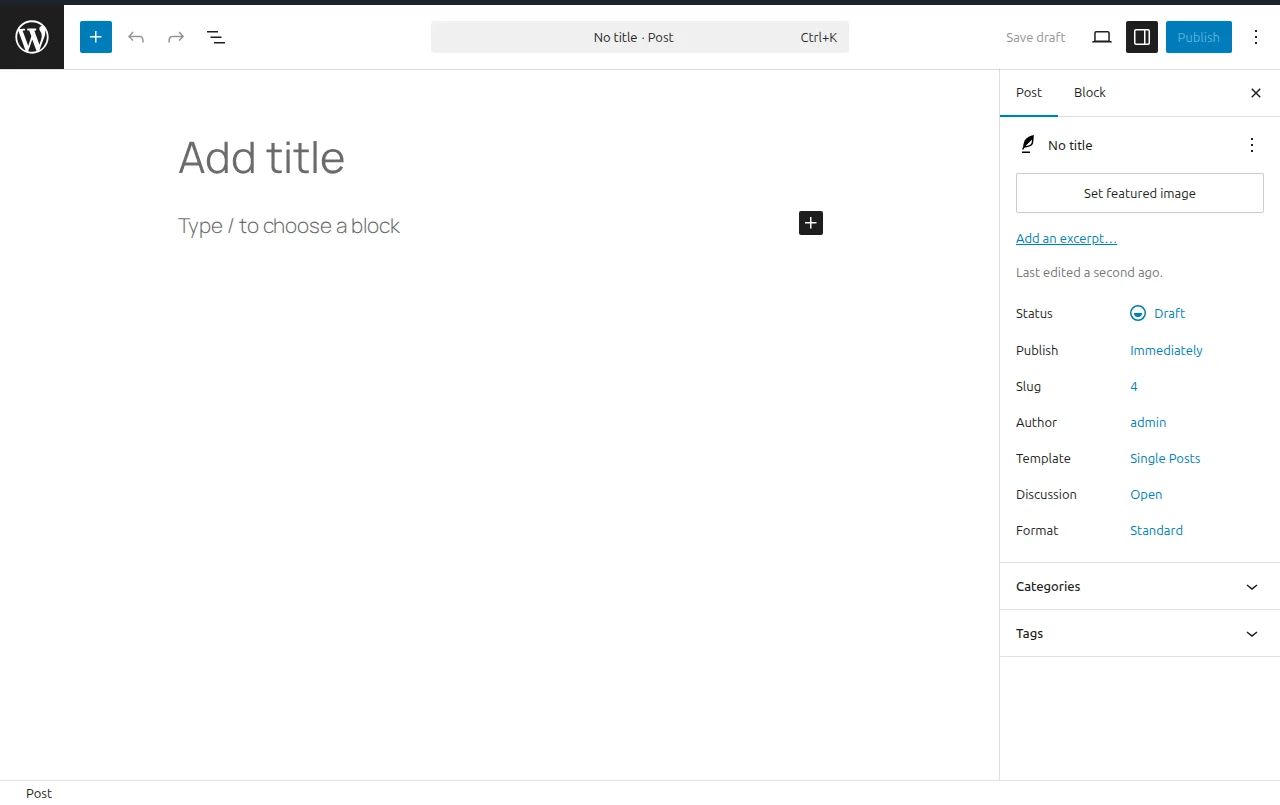
- You'll see the block editor open with a blank canvas. At the top, click where it says "Add title" and type your page name (e.g., "About").
- Press Enter or click below the title to start adding content. By default you'll get a Paragraph block — just start typing.
- To add other elements, click the + (plus) button in the top-left corner or that appears between blocks. This opens the block inserter where you can search for any block type.
- When you're happy with the content, click the Publish button in the top-right corner. WordPress will ask you to confirm — click Publish again.
That's it. Your page is live. Repeat this process for your About, Contact, and Privacy Policy pages.
Creating Your First Blog Post
Creating a post follows almost the same process, with a couple of extra options:
- Go to Posts → Add New Post in your dashboard.
- Add your title and start writing content using blocks, exactly like you did for pages.
- In the right sidebar, under the Post tab, you'll see options that pages don't have — specifically Categories and Tags (more on those below).
- You can also set a Featured Image in the sidebar — this is the thumbnail that appears in your blog feed and when people share your post on social media.
- Click Publish when you're ready.
I always recommend writing your first post about something you know well. Don't overthink it. My first blog post on one of my earliest sites was genuinely terrible — and that's perfectly fine. You'll get better with practice, and you can always edit it later.
Using Blocks — The Building Blocks of Your Content
The block editor is built around the concept of blocks. Everything is a block — paragraphs, headings, images, lists, buttons, columns, you name it. Here are the ones you'll use most often:
- Paragraph — The default block. Just start typing and you're using it.
- Heading — Use these to structure your content (H2 for main sections, H3 for subsections). Type
/headingor use the + inserter. Good heading structure also helps your SEO. - Image — Upload, drag-and-drop, or select from your Media Library. Always add alt text for accessibility and SEO.
- List — Bulleted or numbered lists. Type
/listto insert one, or just start a line with-or1.and the editor will convert it automatically. - Buttons — Great for calls to action. Type
/buttonsto add a clickable button with a link.
Pro tip: you can type a forward slash (/) in any empty block to quickly search for and insert a new block type. It's much faster than clicking the + button every time. Once I learned this shortcut, my content creation speed doubled.
Categories and Tags — Organizing Your Posts
Categories and tags only apply to posts (not pages), and they help organize your content for both visitors and search engines.
Categories are the broad topics your site covers. Think of them as the chapters of a book. A cooking blog might have categories like "Breakfast," "Dinner," and "Desserts." Every post should have at least one category — if you don't pick one, WordPress assigns it to "Uncategorized" (which you should rename to something useful under Posts → Categories).
Tags are more specific descriptors. Using the cooking blog example: a recipe might be in the "Dinner" category with tags like "pasta," "30-minute meals," and "Italian." Tags are optional, and I'd recommend using them sparingly at first. Five to ten tags across your whole site is plenty to start.
My advice: plan your categories before you start writing. Three to five categories is ideal for a new site. You can always add more later, but reorganizing a messy category structure down the line is a pain.
Setting a Static Homepage vs Blog Feed
By default, WordPress shows your latest blog posts on the home page. That's fine for a pure blog, but most sites benefit from a custom static home page that you control. Here's how to change it:
- Create a page called "Home" (or whatever you want) and design it as your homepage.
- Optionally, create a second page called "Blog" — leave it completely empty. WordPress will use it automatically as your posts archive.
- Go to Settings → Reading.
- Under "Your homepage displays," select A static page.
- Set your "Homepage" dropdown to the Home page you created, and "Posts page" to your Blog page.
- Save changes.
I do this on every site I build. Having a dedicated homepage gives you full control over the first impression visitors get, while your blog posts live neatly on their own page.
What's Next?
You now know how to create both pages and posts in WordPress, how to use the block editor's most important blocks, and how to organize your content with categories and tags. The next and final step in getting your site ready is launching your site — making sure everything is polished and ready for visitors.
My biggest piece of advice at this stage: don't wait for perfection. Publish your essential pages, write your first few posts, and improve as you go. Every successful site I've built started with imperfect content that got better over time. The most important thing is to start.
Frequently Asked Questions
What is the difference between a WordPress page and a post?
Pages are for static, timeless content like your About, Contact, and Services pages — they do not have dates, categories, or tags, and they sit in your site's navigation menu. Posts are for dynamic, time-stamped content like blog articles and news updates; they appear in reverse chronological order on your blog page and can be organized with categories and tags. Think of pages as the permanent rooms of your house and posts as the conversations happening inside them.
How many pages does my WordPress site need at launch?
At minimum, you need four essential pages: a Home page, an About page, a Contact page, and a Privacy Policy page. If you sell anything or collect data, add a Terms of Service page too. Beyond that, the number depends on your site's purpose — a simple blog might only need those four, while a business site might need pages for services, pricing, testimonials, and FAQs. Start lean and add pages as your site grows rather than creating empty placeholder pages.
Can I convert a WordPress page into a post (or vice versa)?
WordPress does not have a built-in way to convert between pages and posts, but there are plugins that make it easy. The most popular one is "Post Type Switcher," which adds a simple dropdown to the editor that lets you switch any content between page, post, or custom post type with one click. I have used it dozens of times when clients realized their "About Our Process" page would actually work better as a blog post for SEO purposes.
What is a featured image and do I need one for every post?
A featured image (also called a post thumbnail) is the main image that represents your post or page. It appears at the top of your article, in blog listing pages, and when someone shares your link on social media. You should absolutely set a featured image for every post — articles with images get significantly more clicks and shares. Use images that are at least 1200 pixels wide to look sharp on all devices and in social media previews.
How do I schedule a WordPress post to publish automatically?
In the WordPress editor, look at the "Publish" panel on the right side and click the date next to "Publish." A calendar will appear where you can pick any future date and time. Once you set a future date, the blue "Publish" button changes to "Schedule." Click it, and WordPress will automatically publish the post at your chosen time. This is incredibly useful for maintaining a consistent publishing schedule — I batch-write posts on weekends and schedule them throughout the week.
Should I use categories, tags, or both to organize my posts?
Use categories as the primary way to organize your content into broad topics — think of them as the table of contents for your site. Most sites need 5-10 categories at most. Tags are optional and work best as specific keywords that cut across categories, like "beginner" or "free plugin." The biggest mistake I see beginners make is creating dozens of categories and tags with only one post each, which creates thin, low-value archive pages that hurt your SEO. Keep it simple and only create a new category or tag when you have at least 3-5 posts that belong in it.

Written by Marvin
Our team tests and reviews WordPress products to help beginners make confident choices.
Learn more about our team →You might also like
7 Essential Plugins Every WordPress Site Needs (2026)
Don't install 30 plugins. Start with these 7 that every WordPress site actually needs — for security, SEO, speed, and backups.
postHow to Choose & Install a WordPress Theme (Beginner's Guide)
Your theme controls how your site looks. Here's how to pick the right one and install it in under 5 minutes.
postEssential WordPress Settings After Install (2026 Guide)
Just installed WordPress? Here are the 10 settings you need to configure right away — before you do anything else.
postWordPress Pre-Launch Checklist — 15 Things Before Going Live
Before you share your site with the world, run through this 15-point checklist to make sure everything is ready.